

Master detectability and consumable timing before anything else. Stay near your concealment edge, check the minimap for radar-capable ships before pushing a cap, and never sit still in your own smoke. Everything else in this guide (torpedo angles, island brawling, nation flavor) only matters if you're still alive to use it.
TL;DR:
- Maintaining awareness of enemy radar and hydro cooldowns is crucial for avoiding detection and unnecessary deaths during pushes.
- Firing guns or launching torpedoes increases your detectability, so timing these actions carefully is essential to stay hidden and maximize surprise.
- Proper use of smoke involves approaching and discharging from cover without lingering, as smoke attracts radar and hydro detection once deployed.
- Focusing on detection discipline, torpedo patience, and map awareness helps improve survivability and team contribution more than damage output alone.
- Regularly tracking your own launch distances, hit rates, and disengage thresholds develops habits that significantly enhance overall destroyer performance.
Table of Contents
- What Is the Core World of Warships Destroyer Guide Strategy?
- Which Destroyer Playstyle Fits Your Ships?
- How Do You Time Consumables Like Smoke and Radar?
- What Are the Best Torpedo Aiming and Spread Tactics?
- How Do You Win or Escape a Destroyer Gunfight?
- How Should Destroyers Scout and Control the Map?
- Which Advanced Habits Separate Good Destroyer Captains From Great Ones?
- What Three Destroyer Skills Should You Practice Right Now?
- Where to Find Updated Destroyer Builds and Drills
- Sources
- FAQ
What Is the Core World of Warships Destroyer Guide Strategy?
Destroyers win games by controlling information, not by racking up the biggest damage numbers on the scoreboard. Every decision you make, from where you sit on the map to when you pop smoke, comes back to one mechanic: detectability, the distance at which enemies can spot you.
Your detectability range shrinks or grows depending on what you're doing. Sailing quietly through open water keeps you at your base concealment value. Firing your main guns spikes that number for several seconds, sometimes enough to get you spotted by a cruiser two kilometers farther out than you expected. Torpedo launches carry a smaller detectability penalty than gunfire, which is exactly why torpedo-focused destroyers can slip in, launch, and vanish again if they respect the timing.
The official artillery destroyer guide frames this clearly: gunboats survive through maneuvering and smoke discipline, not raw tankiness, and they should pick fights against slow targets while avoiding close-range brawls with cruisers that outgun them. That's a mechanical fact of the ship class, not just advice for cautious players.
Statistic Callout: Destroyers have no citadel zone, according to the World of Warships Wiki. That caps the damage a single non-citadel shell can deal to you, which is why destroyers often survive hits that would delete a cruiser. It doesn't mean you're tanky. A well-aimed battleship secondary barrage or a full cruiser salvo can still strip your health bar in seconds.
Here's how that HP and weapon math plays out in a real match:
- Low-tier and mid-tier destroyers often carry health pools common for their tiers, while top-tier hulls have significantly higher health, but none of that HP includes a citadel multiplier working against you.
- Guns give you fast, repeatable damage output and let you contest caps and finish off damaged ships, but every salvo you fire is a flare telling the enemy team exactly where you are.
- Torpedoes deal damage in large, delayed bursts and can swing a flank fight in your favor, but they demand patience, angle prediction, and a launch position you can escape from.
- Hybrid destroyers try to split the difference, using guns for map pressure and torpedoes as a finishing tool or area denial weapon.
The practical takeaway: guns are your bread-and-butter damage tool for contested caps and finishing wounded ships, while torpedoes are your leverage play, the thing you use to force a battleship off a flank or punish a pushing cruiser. Knowing which tool the moment calls for separates destroyer captains who carry games from ones who feed damage to the enemy team.
Which Destroyer Playstyle Fits Your Ships?
Every destroyer line pushes you toward one of three roles, and figuring out which one your ship wants you to play is half the battle before you even load into a match.
Torpedo destroyers live and die by launch timing. Their guns are usually weak or slow-firing, so their job is to sneak into range, drop a spread, and disappear before the return fire finds them. The official torpedo destroyer guide recommends picking your engagement distance based on the gap between your detectability range and your torpedo range, since firing your guns exposes you for roughly 20 seconds of visibility that a torpedo boat usually can't afford.
Gunboats flip that priority. They carry rapid-fire, accurate guns and often trade away torpedo range or damage for better concealment and better artillery consumables. Their job is cap control, harassing cruisers, and racking up consistent damage over the course of a match rather than waiting for one big torpedo hit.
Hybrid or utility destroyers carry both tools reasonably well, plus support consumables like radar or hydroacoustic search, and they're built to adapt mid-match rather than commit to one role from minute one.
Nation flavor tells you a lot about which role you'll end up playing:
- Japan built its early destroyer line around long-range torpedoes and stealth, rewarding patient, ambush-style play.
- USA destroyers lean gunboat at low and mid tiers, then split into gun-focused and torpedo-focused branches at higher tiers.
- United Kingdom destroyers specialize in smoke-firing gunnery, letting them shoot accurately while hidden in their own smoke screen.
- Russia and the USSR field aggressive, high-speed gunboats with strong shell arcs but often weaker torpedoes.
- Germany favors hybrid destroyers with solid guns, deep-water torpedoes at some tiers, and strong hydroacoustic search access.
- France emphasizes speed and engine boost, trading raw stealth for the ability to reposition fast.
- Pan-Asia and the pan-European line mix gunboat and torpedo traits depending on tier, often borrowing hull designs from other nations.
- Italy brings smoke-generating destroyers with a focus on flexible, aggressive positioning.
A ship like the Fletcher, detailed on the World of Warships Wiki, illustrates the hybrid approach well: solid torpedo range and damage paired with usable guns and strong consumables, which is why it's remembered as one of the more forgiving mid-to-high-tier American destroyers to learn on.
How Do You Time Consumables Like Smoke and Radar?
Consumables are the difference between a destroyer that dictates the pace of a match and one that gets deleted the moment it peeks out from cover. Timing them well is a repeatable skill, not luck.
- Smoke should be popped before you're spotted, not after. Use it to approach a cap, screen a teammate, or create a firing position, then move through it rather than parking in the middle.
- Radar on enemy cruisers usually runs a set duration once activated. If you get pinged by radar, your best move is immediate evasive maneuvering toward the nearest cover, not panicking and holding your course.
- Hydroacoustic search reveals torpedoes and nearby ships regardless of smoke or terrain, so treat any enemy ship known to carry hydro as a threat that can see through your smoke screen.
- Engine boost is your emergency exit and your aggression tool in one. Save at least one charge for disengaging a losing fight rather than burning it early just to close distance faster.
- Repair party, where your hull carries it, should be saved until after you've taken meaningful damage, not used reflexively at the first hit, since healing too early wastes potential HP recovery on a fight that isn't over yet.
Reading the minimap is how you predict when the enemy will use these tools against you. If a Des Moines or similar radar cruiser hasn't fired its radar in the last two minutes, assume it's up and available, and don't push a cap blind. The Levvvel destroyer guide makes a point worth repeating here: smoke discipline, meaning not lingering in it, is one of the most common places new destroyer captains lose their ship for free.
Smoke has a reputation as a safe zone, but the Smoke Screens wiki entry is blunt about the risk: smoke attracts radar and hydro attention, and experienced players treat it as a tool to manipulate enemy consumable timing, not a hiding spot to camp in for the rest of the match.
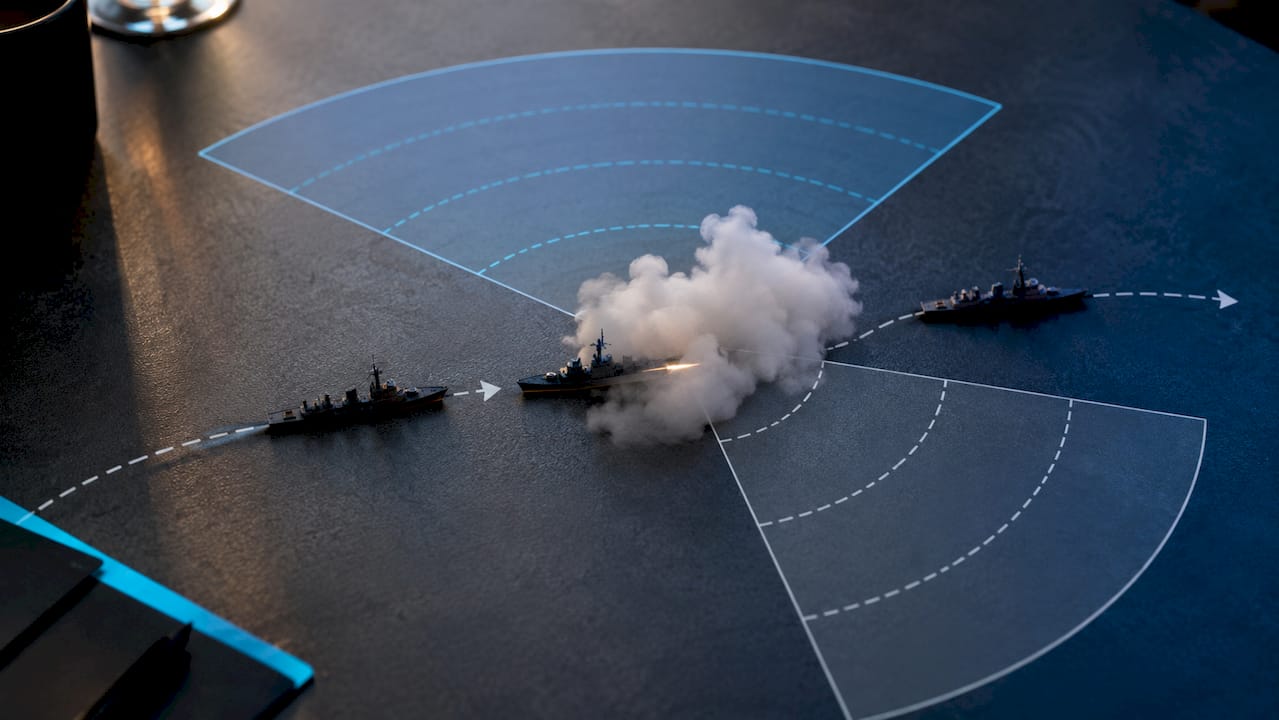
Pro Tip: Pop smoke, fire a few salvos or launch torpedoes, then reposition out the side of the cloud instead of the way you entered. Enemies watching your smoke will often predict your exit point based on your entry angle.
What Are the Best Torpedo Aiming and Spread Tactics?
Torpedo hits win matches, but wasted torpedo salvos lose them, since a destroyer that's fired everything and missed has nothing left to threaten a flank with. The fix is treating every launch as a calculated bet, not a reflex.
Launch range depends entirely on torpedo type. Short-range, fast torpedoes reward getting in close where the target has less time to react and dodge. Long-range torpedoes trade speed for reach, letting you fire from well outside detectability range, but that extra travel time gives the target more room to change course before impact. The torpedo destroyer guide frames this as a direct tradeoff: pick an engagement distance that sits between your detectability range and your torpedo range, so you can launch without immediately eating return fire.
Statistic Callout: Firing your main battery exposes a destroyer for an extended period of increased visibility, per the official torpedo destroyer guide. That's an eternity against a battleship with working line of sight, which is why torpedo boats often hold fire entirely rather than mix guns into a stealth approach.
Spread choice comes down to reading the target's movement:
- Against a ship holding a steady course, a tight spread maximizes hit probability on that one heading.
- Against a ship that's actively juking or has already spotted your launch, a wide spread covers more of the water and punishes any turn the target makes.
- Angle your spread to intercept where the target will be in 20 to 40 seconds, not where it is right now, since torpedo travel time at range can exceed a minute for slower long-range torpedoes.
- Use island geometry to funnel targets into a spread. A ship hugging a coastline has fewer escape angles than one in open water.
Firing torpedoes blind into enemy smoke sounds aggressive, but it's usually a low-value play unless you have independent confirmation a ship is inside, either from a teammate's spotting or from hydro. Smoke clouds are large enough that a blind spread frequently threads the gap between ships, wasting a full salvo for nothing.
Before you fire, do a quick torpedo safety check: confirm no friendly ships are crossing your firing lane, and call out your launch in chat if a teammate is pushing the same flank. Friendly torpedo damage is entirely avoidable and it's one of the fastest ways to lose your team's trust for the rest of the match.
How Do You Win or Escape a Destroyer Gunfight?
Short-range fights are where destroyer matches are decided fastest, and the ships that consistently come out ahead are the ones that decide whether to fight or flee before the first shell lands, not after.
Accept a gunfight when you have a health advantage, a concealment advantage, or backup nearby, and when the enemy destroyer is committed to a course that limits its escape options. Kite or disengage the moment any of those conditions flip against you, especially if a third ship (a cruiser or a second destroyer) is closing in to third-party the fight.
Islands aren't just cover, they're a weapon. Use them to break line of sight mid-brawl, forcing an opponent to either commit around the corner blind or give up the chase. A common high-level move is baiting an enemy destroyer around an island's tip, then reversing course to catch it exposed on the other side.
- Against a battleship's main battery, never hold a straight course. Turn into or away from the salvo as it's about to land, since a full broadside hit from a battleship can end your game in one shot.
- Against cruiser AP fire, keep angling and speed changes irregular. Cruisers with AP shells punish predictable, steady courses hardest.
- Against a torpedo spread, check the water for wake lines and turn parallel to the spread rather than trying to outrun it head-on, since running the same direction as the torpedoes just delays the hit.
Set a firm disengage trigger before you commit to any fight: a specific HP threshold, a specific consumable state (repair used, smoke gone), or a third-party ship spotted closing distance. The official artillery destroyer guide is direct about this: destroyers survive fights through maneuvering and smoke, not through tanking damage, so the moment maneuvering stops being an option, it's time to leave.
Pro Tip: *Pick your disengage HP threshold before the fight starts, not during it.
How Should Destroyers Scout and Control the Map?
A destroyer's biggest contribution to a win often has nothing to do with damage dealt. It's the vision your team gets because you were willing to sit at the edge of your detectability range and watch a cap or a chokepoint.
Early-game scouting means pushing toward key caps or flank routes at the start of the match, sitting just inside your concealment edge, and reporting enemy positions before your team commits. This single habit does more for a team's win rate than almost any other destroyer skill, because it lets your battleships and cruisers make informed pushes instead of blind ones.
Capping safely means never sitting in a cap circle without an escape route planned, and it means understanding that a cap you can see into is a cap the enemy can potentially see into as well, especially against ships with hydro or radar. Baiting radar is a legitimate tactic: sail into a position where you're a tempting target, force the radar cruiser to burn its consumable on you, then let your team's other destroyers or ships exploit the window while that radar is on cooldown.
Late-game destroyer play shifts toward ambush and denial:
- Torpedo ambushes near caps punish enemies who assume the area is clear after the early skirmishes settle down.
- Sitting on a flank cap with torpedoes loaded denies the enemy team an easy final push, even if you never fire a shot.
- Smoke used defensively in the last few minutes of a match can let you stall a cap capture just long enough for reinforcements to arrive.
What you report matters as much as what you spot. Prioritize calling out radar cruisers, torpedo warnings, and any battleship pushing a flank alone, since those three callouts change how your team plays far more than a generic "enemy spotted" ping. A destroyer that spots consistently and communicates clearly often outperforms one that racks up more damage but plays in silence.
Which Advanced Habits Separate Good Destroyer Captains From Great Ones?
Most destroyer losses trace back to the same handful of mistakes, and every one of them has a specific fix.
- Sitting still in smoke. Fix: treat smoke as a corridor, not a room. Enter, act, exit through a different angle.
- Firing guns while trying to stay hidden. Fix: decide before the engagement whether you're playing stealth or playing gunboat this match, and stick to it.
- Ignoring radar cooldowns. Fix: track when enemy radar cruisers last activated and treat that timer as gospel before pushing a cap.
- Wasting torpedoes on blind smoke fires. Fix: only fire into smoke with confirmed spotting from a teammate or hydro.
- No disengage plan. Fix: set an HP or consumable threshold before every fight, not during it.
At higher tiers, small habits compound. Tracking your own torpedo hit rate and average launch distance, a practice the Levvvel guide recommends, improves your aim faster than simply counting total damage, because it isolates the actual skill you're trying to build.
Here's a four-week plan for turning these fixes into habits:
- Week 1: Focus entirely on detection discipline. Track how often you get detected while firing versus while sneaking, and aim to reduce spotted-while-firing incidents.
- Week 2: Focus on torpedo hit rate. Log your launches and hits each match, aiming for a steady week-over-week improvement.
- Week 3: Focus on survival rate. Track how many matches you finish alive versus how many end in an early death, and tighten your disengage triggers.
- Week 4: Combine all three metrics and focus on team communication, specifically calling out radar and flank pushes consistently.
For ship-specific builds and updated recommendations as patches shift the meta, Jayplaysgames keeps a running best-ships breakdown worth checking before you commit to a new tech tree line.
What Three Destroyer Skills Should You Practice Right Now?
A destroyer captain who pushes a cap alone against an unspotted radar cruiser usually finds out the hard way why concealment discipline exists. That single mistake, showing up in cap circles constantly, is probably the most common thread connecting low-performing destroyer games at every tier.
Three skills matter more than the rest combined. First, concealment management: knowing your detectability number cold, for both stealth and after firing, and never being surprised by when you become visible. Second, torpedo patience: waiting for the shot that actually lands instead of firing the moment torpedoes come off cooldown. Third, map awareness: checking enemy consumable cooldowns before committing to any push, not after getting deleted by radar you should have tracked.
None of these skills require a better ship. They require slowing down and thinking one step ahead of the minimap, which is exactly the gap between a destroyer that feeds damage and one that decides the outcome of a match.
— QuickWave
Where to Find Updated Destroyer Builds and Drills
Patches shift torpedo ranges, consumable timings, and tier balance often enough that a guide written today can miss a detail six months from now. That's where an ongoing resource beats a one-time read.
Jayplaysgames keeps a living set of World of Warships resources built around exactly the gap this guide covers: knowing the mechanics versus applying them consistently. The beginner guide walks new captains through foundational drills for detection discipline and consumable timing, while the best-ships page tracks which destroyers are worth grinding toward at each tier as the meta shifts. If you're weighing which free-to-play title deserves your time next, or you're comparing destroyer-heavy games against other genres, the full games hub rounds up honest breakdowns across titles worth trying. Start with the beginner guide, run the four-week practice plan above, and check back on the best-ships page before your next tech tree grind.
Sources
For deeper mechanical detail beyond this guide, the official artillery destroyer and torpedo destroyer "How to Play" pages remain the most direct developer guidance available. The World of Warships Wiki covers technical specifics like detectability values and the no-citadel mechanic in more detail than any single article can. For community meta context, the destroyer tier list tracks how nation strengths shift after balance patches, and the Levvvel guide offers practical, drill-based advice worth revisiting as you improve.
- How to Play: Artillery Destroyers | World of Warships
- How to Play: Torpedo Destroyers | World of Warships
- Ship:Destroyers — World of Warships Wiki
- How to play a Destroyer in World of Warships — Levvvel
FAQ
Which Destroyer Is Considered the Best in World of Warships?
There's no single best destroyer since it depends on tier and playstyle, but ships that balance strong concealment with flexible torpedo and gun options, like the mid-to-high-tier American Fletcher, are consistently praised for being forgiving to learn on and effective in multiple roles.
How Do You Beat an Enemy Destroyer in a Fight?
Win destroyer duels by using islands to break line of sight, keeping your course unpredictable, and only committing to a fight when you hold an HP, concealment, or backup advantage over the opponent.
Which Nation Has the Strongest Destroyers in World of Warships Legends?
Nation strength shifts with balance patches, but Japanese destroyers are traditionally known for long-range torpedo ambush play, while American and Russian lines lean toward stronger gunboat performance, so the "best" nation depends on whether you prefer torpedo patience or gun pressure.
What Is a Strong Tier 6 Destroyer to Learn On?
Mid-tier destroyers across most nations are a common training ground for concealment management and torpedo timing, since this is typically where players first face radar and hydro consistently. Checking Jayplaysgames' best-ships breakdown before committing XP to a specific tier 6 hull helps confirm which options fit the current meta.
Why Do New Destroyer Captains Keep Dying to Radar?
Most radar deaths come from pushing a cap without tracking when the enemy radar cruiser last used its consumable, so building the habit of checking cooldowns before committing is the single fastest fix for this mistake.