

Prioritize Warmaster or Giant Slayer on your Clan Boss nuker, Deadly Precision and Blade Disciple on general attackers, and Life Drinker on support healers — these nodes multiply what your champion already does rather than adding generic stats. That single principle drives every good mastery decision in this game.
Here's the fastest path by role:
- Arena attacker/cleanser: Deadly Precision (T5 Offense), Blade Disciple (T6 Offense), Keen Strike (T3 Offense), Shield Breaker (T4 Offense). Speed and burst damage are the priority; you want to hit hard before the enemy team acts.
- Clan Boss single-target nuker: Warmaster (T6 Offense) or Giant Slayer (T6 Offense), Single Out (T4 Offense), Heart of Glory (T5 Offense). These nodes specifically reward hitting one target repeatedly, which is exactly what Clan Boss demands.
- Dungeon AOE dealer: Deadly Precision, Blade Disciple, and Grim Resolve (T5 Defense) for sustain on longer boss fights. AOE champions benefit from consistent crit and damage scaling across waves.
- Support/healer: Life Drinker (T5 Support), Healing Savior (T4 Support), and Grim Resolve (T5 Defense). Pair Offense tree access with Support tree depth to keep your healer alive and effective.
- Tank: Grim Resolve, Shield Breaker (if the tank also debuffs), and survivability nodes from the Defense tree. Tanks rarely need Tier 6 Offense nodes; their value comes from staying alive and enabling teammates.
Key Takeaways
Prioritize reaching a single Tier 6 node that fits your champion's role, funnel scrolls via solo-carry Labyrinth runs, and use the free reset only when the build is genuinely wrong.
| Point | Details |
|---|---|
| Lock Tier 6 first | Plan every mastery page backward from the Tier 6 node your champion needs (Warmaster, Giant Slayer, or Blade Disciple). |
| Solo-carry farming | Run the Labyrinth with your target champion alone or with one mastered carry to funnel scroll drops efficiently. |
| Use the free reset wisely | Save the one free reset per champion for a confirmed build correction, not early experimentation. |
| Ascend before farming | Ascension unlocks higher mastery tiers; farming scrolls before ascending wastes the slots you'll need most. |
| Funnel, don't scatter | Concentrate scrolls on three to five endgame champions rather than spreading them across your full roster. |
Table of Contents
- How does the mastery system work in Raid Shadow Legends?
- Every mastery node you need to know, by tree
- What each mastery tier unlocks and who needs it
- Ready-to-copy mastery pages for every content type
- How to farm mastery scrolls without wasting runs
- Should you invest in masteries right now? A quick checklist
- Sources
- FAQ
How does the mastery system work in Raid Shadow Legends?
Masteries are passive bonuses tied permanently to a single champion. Plarium's official rules confirm three branches: Offense, Defense, and Support. Each champion can draw from up to two branches at once, so you have to commit. The system is organized into six tiers, with higher tiers requiring more scrolls and a minimum champion rank to unlock.
The three trees at a glance
- Offense tree: Boosts damage output, critical rate, critical damage, and adds special proc effects like Warmaster and Giant Slayer.
- Defense tree: Improves survivability through HP, resistance, shield effects, and sustain mechanics.
- Support tree: Enhances healing, buff/debuff utility, speed, and team-wide effects.
Scroll types and where they come from
All three scroll types drop exclusively in the Minotaur's Labyrinth. You can also spend gems to fully unlock a champion's masteries without farming, which Plarium lists as an official option in the interface. The scroll types are:
Scrolls are champion-bound the moment they drop. Whichever champion receives a scroll after a Labyrinth run keeps it permanently. You cannot transfer scrolls between champions, which makes farming strategy critical.
Reset rules
You get one free reset per champion. Every reset after that costs gems. This is Plarium's official policy, and it means your first mastery page should be thoughtful rather than experimental. Use the free reset to correct a genuinely wrong build, not to test ideas.
Pro Tip: Don't spend gems on a reset until you've confirmed the champion is a long-term keeper. Check the Raid tier list first to see whether the champion holds value in the current meta before committing gem resources.
Every mastery node you need to know, by tree
The community-maintained index at AyumiLove is the most complete node reference available. Here is a practical breakdown of the nodes that actually matter, organized by tree.
Offense tree highlights
- Deadly Precision (T5): Increases critical rate. Near-mandatory for any attacker who isn't already crit-capped through gear.
- Blade Disciple (T6): Increases critical damage. The natural companion to Deadly Precision; together they define the standard attacker page.
- Keen Strike (T3): Flat damage boost. A solid filler node on the path to higher tiers.
- Shield Breaker (T4): Deals bonus damage to shielded targets. Excellent in Arena where shields are common.
- Heart of Glory (T5): Increases damage when the champion's HP is above a threshold. Strong on tanky attackers who stay healthy.
- Single Out (T4): Deals bonus damage to targets with lower HP. Pairs well with Clan Boss nukers finishing off weakened enemies.
- Warmaster (T6): Triggers a bonus hit on the first skill use each turn, dealing a percentage of the target's MAX HP. The top choice for Clan Boss single-target damage.
- Giant Slayer (T6): Triggers a bonus hit that deals a percentage of the target's MAX HP, but can proc on any hit. Slightly more consistent across multiple hits than Warmaster in some scenarios.
Defense tree highlights
- Grim Resolve (T5): Increases the champion's HP. Useful for supports and tanks who need a survivability floor.
- Shield Breaker appears in Offense, but Defense nodes like Resurgent (T4) and Delay Death (T5) serve tanks who need to absorb punishment.
- Cycle of Magic (T5): Reduces cooldowns when the champion is hit. Niche but powerful for tanks with strong active skills.
Support tree highlights
- Life Drinker (T5): Heals the champion for a portion of damage dealt. Excellent on healers and sustain-focused supports who also deal some damage.
- Healing Savior (T4): Increases the effectiveness of healing skills. The core node for dedicated healers.
- Swarm Smiter (T5): Increases damage against enemies with buffs. Useful in Arena where opponents often stack buffs.
- Lore of Steel (T4): Increases the set bonuses from artifacts. One of the most underrated nodes in the game for champions built around specific artifact sets.
Pro Tip: Lore of Steel from the Support tree is worth considering on any champion built around a strong artifact set bonus (like Lifesteal or Savage). The amplified set effect often outperforms a raw stat node at the same tier.
What each mastery tier unlocks and who needs it
Tiers 1 and 2 are access nodes. They provide small stat bumps (attack percentage, defense percentage, HP percentage) and exist primarily to open the path to higher tiers. Every champion needs to pass through them, but don't overthink the choices here. Pick whatever aligns with your tree direction.
Tiers 3 and 4 are where utility starts. Nodes like Keen Strike, Shield Breaker, Single Out, and Healing Savior live here. For mid-game champions, these tiers often represent the practical ceiling before scroll scarcity slows progress. A Rare champion used for farming can be perfectly functional with a solid Tier 4 node as the capstone.
Tiers 5 and 6 are build-defining. Deadly Precision, Heart of Glory, Warmaster, Giant Slayer, Blade Disciple — these are the nodes players plan entire mastery pages around. Reaching Tier 6 requires Divine Scrolls, which only drop in the higher Labyrinth stages, and the champion must be at a sufficient rank and ascension level to unlock the slot.
For a low-rarity champion you're using temporarily, stopping at Tier 4 or 5 is often the right call. For a Legendary or Epic you'll use in endgame content, push to Tier 6 without hesitation.

Pro Tip: Plan your mastery page backward from the Tier 6 node you want. Every node below it is just the path to get there. Don't pick Tier 1–4 nodes based on their own merit; pick them based on which path reaches your target Tier 6 node most efficiently.
Cross-game mastery design research, including Mobalytics' breakdown of competitive mastery systems, consistently shows that concentrating points in a primary tree with a smaller secondary investment outperforms an even split. The same logic applies here: go deep in one tree to reach a Tier 6 node, then use your second tree for targeted utility rather than spreading thin across both.
Ready-to-copy mastery pages for every content type
These builds reflect community-tested setups. For champion-specific pages, HellHades maintains detailed role builds you can cross-reference.
Arena attacker
Nodes: Keen Strike (T3), Shield Breaker (T4), Heart of Glory (T5), Deadly Precision (T5), Blade Disciple (T6). Secondary tree: 2–3 nodes from Support for speed or Lore of Steel.
Rationale: Arena is decided in the first round. Blade Disciple and Deadly Precision maximize burst damage on a single turn, and Shield Breaker punishes the shields that Arena defenders commonly stack. Pair with Speed and Savage artifact sets for maximum first-turn impact. See the Arena guide for full team composition advice.
Clan Boss single-target nuker
Nodes: Keen Strike (T3), Single Out (T4), Heart of Glory (T5), Warmaster (T6). Secondary tree: Grim Resolve (T5 Defense) for survivability on longer Clan Boss fights.
Rationale: Warmaster's MAX HP-based bonus hit is the single highest-damage node available for Clan Boss. Single Out adds bonus damage when the boss drops below certain HP thresholds. Heart of Glory rewards champions who stay healthy, which is achievable with a Lifesteal set. For a full Clan Boss strategy, the Clan Boss guide covers team comps and damage benchmarks.
Giant Slayer is a viable alternative to Warmaster for champions who hit multiple times per turn. The proc rate differs, so check your champion's skill kit before choosing.
Dungeon AOE dealer
Nodes: Keen Strike (T3), Shield Breaker (T4), Deadly Precision (T5), Blade Disciple (T6). Secondary tree: Grim Resolve (T5 Defense) for wave sustain.
Rationale: Dungeon runs involve waves of enemies before the boss. AOE attackers need consistent crit and damage to clear waves fast, then survive the boss. Grim Resolve in the secondary tree gives the HP buffer that prevents one-shots on harder stages.
Support/healer
Nodes (Support tree): Healing Savior (T4), Life Drinker (T5). Secondary tree (Defense): Grim Resolve (T5), and 2–3 lower Defense nodes for survivability.
Rationale: A healer who dies early is useless. Grim Resolve keeps the support alive, while Healing Savior and Life Drinker amplify the healing output that justifies the champion's slot on the team. Avoid going deep into Offense on a dedicated healer; the damage gain rarely compensates for the lost sustain.
Tank
Nodes (Defense tree): Resurgent (T4), Delay Death (T5), Grim Resolve (T5). Secondary tree (Offense): Shield Breaker (T4) if the tank applies debuffs, otherwise Support nodes for utility.
Rationale: Tanks need to absorb hits and stay relevant. Delay Death and Grim Resolve extend survivability significantly. If the tank also debuffs enemies (a common design in Raid), Shield Breaker adds meaningful damage contribution without abandoning the defensive identity.
Pro Tip: When a champion's kit doesn't fit cleanly into one archetype — say, a "support" champion who also deals heavy damage — build for the role you actually use them in most. A damage-dealing support in Arena should lean Offense; the same champion in a Dungeon support role might lean Support/Defense. The mastery page can change with a reset.
How to farm mastery scrolls without wasting runs
The Minotaur's Labyrinth is the only place Basic, Advanced, and Divine Scrolls drop, as confirmed by Plarium's official mastery documentation. Higher Labyrinth stages unlock higher scroll tiers, so your ability to farm Divine Scrolls is gated by your team's power level.
After each Labyrinth run, scrolls are distributed at random to eligible champions in your party. "Eligible" means a champion who still has mastery slots to fill. This random assignment is the key mechanic that makes party composition matter for farming.
Scroll farming by Labyrinth stage
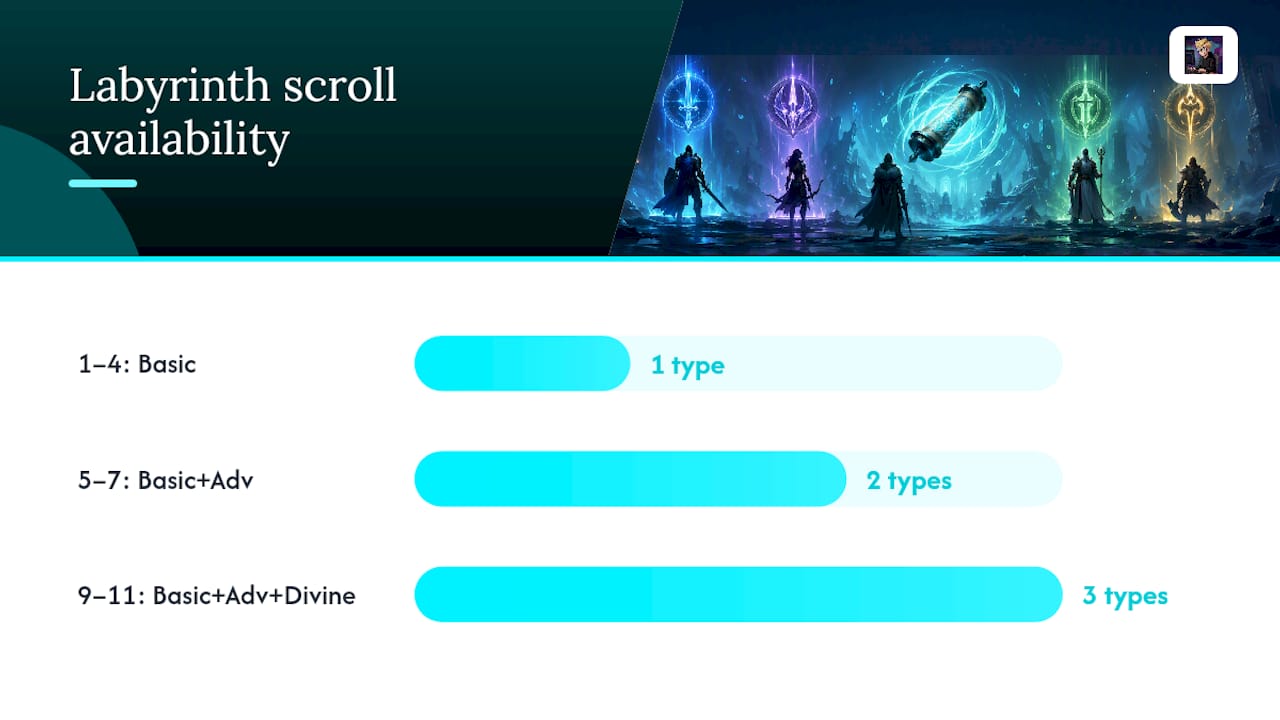
| Stage Range | Scroll Types Available | Notes |
|---|---|---|
| Stages 1–4 | Basic Scrolls only | Good for Tier 1–3 on new champions |
| Stages 5–7 | Basic + Advanced Scrolls | Unlocks Tier 4–5 progress |
| Stages 9–11 | Basic + Advanced + Divine | Full mastery unlock possible |
The solo-carry farming method
The most efficient way to funnel scrolls to a target champion is to run the Labyrinth with that champion alone, or with only one already-fully-mastered champion. Since scrolls go to eligible champions randomly, removing fully mastered champions from the party eliminates them as scroll recipients. Your target champion receives most or all drops from the run.
This method requires your target champion to be strong enough to clear the stage solo, or paired with a mastered carry. It's slower per run but dramatically more scroll-efficient per champion.
- Run your target champion solo or with one mastered carry.
- Clear the highest stage your team can handle reliably.
- Repeat until Basic and Advanced Scrolls are exhausted, then push to higher stages for Divine Scrolls.
The gem unlock option is available in the interface and lets you fully master a champion without farming. This is worth considering when a champion is immediately needed for a specific content type and scroll farming would take weeks. Check the farming guide for a full breakdown of Labyrinth energy costs and run efficiency.
Pro Tip: Don't farm scrolls for a champion you haven't ascended yet. Ascension unlocks higher mastery tiers, so scrolls earned before ascension can't fill the slots you'll want most. Ascend first, then farm.
Should you invest in masteries right now? A quick checklist
Run through these questions before spending scrolls on any champion.
- Is this champion's role confirmed? Know whether they're an attacker, support, tank, or hybrid before picking a tree. Aligning tree choices with the champion's primary function produces the largest practical gain, per Plarium's own guidance.
- Can the champion reach the tier you need? Check rank and ascension requirements for Tier 5 and 6 nodes. Investing scrolls in a champion you haven't ascended yet is a common early-game mistake.
- Does the mastery synergize with the artifact set? A Lifesteal set champion benefits from Heart of Glory. A Savage set attacker benefits from Blade Disciple. Masteries and gear compound each other. See the gear guide for artifact pairing logic.
- Will this champion still be relevant in 4–6 weeks? Meta shifts happen. Before spending Divine Scrolls on a champion, confirm they're not about to be replaced by a fusion target or a stronger option you're working toward.
- Do you have enough scrolls to reach the Tier 6 node? Partial mastery pages are fine temporarily, but plan the full path before you start. Stopping at Tier 4 on a champion who needs Warmaster is a waste of the scrolls already spent.
When to use gems vs. farm scrolls
Use gems to unlock masteries when the champion is immediately needed for Clan Boss or a specific dungeon and farming would take a long time. Farm scrolls when you have time and the champion is a secondary priority. The free first reset is best saved for a genuine build correction, not experimentation.
Because scrolls are champion-bound and can't be transferred, don't scatter them across many underused champions early in the game. Funnel scrolls to the three to five champions you actively use in endgame content. That concentration of investment pays off faster than spreading resources thin.
Pro Tip: The single highest-ROI mastery investment for most accounts is Warmaster on the primary Clan Boss nuker. If you're unsure where to spend scrolls first, start there.
The honest take on mastery planning
Most players overthink the secondary tree and underthink the primary one. The real decision is which Tier 6 node fits your champion, and everything else is just the path to get there. Warmaster and Giant Slayer are the most impactful nodes in the game for damage output against single targets. Blade Disciple and Deadly Precision define the standard attacker page for everything else. If you're building around those four nodes and using the solo-carry Labyrinth method to farm efficiently, you're already ahead of most players.
The RAID hub at Jayplaysgames has champion-specific builds, tier lists, and beginner resources if you want to go deeper on any of the roles covered here.

Sources
- Masteries –RAID: Shadow Legends
- Raid Shadow Legends Champion Masteries Guide - AyumiLove
- Raid Shadow Legends - HellHades
- LoL Classic Masteries Breakdown
FAQ
What are the best masteries for Clan Boss in Raid Shadow Legends?
Warmaster is the top Tier 6 node for Clan Boss single-target damage because its bonus hit scales off the boss's MAX HP. Pair it with Single Out (T4) and Heart of Glory (T5) for the strongest single-target nuker page.
How important are masteries in Raid Shadow Legends?
Masteries are one of the three core customization layers alongside artifacts and skills, per Plarium's official champion progression framework. A fully mastered champion with a Tier 6 node like Warmaster or Blade Disciple deals meaningfully more damage than an unmastered version with identical gear.
How much energy does it take to max masteries in Raid Shadow Legends?
Plarium does not publish a fixed energy figure for full mastery completion, as run efficiency varies by Labyrinth stage and party composition. The gem unlock option in the interface bypasses farming entirely and is the fastest path when energy is limited.
How many times can you reset masteries in Raid Shadow Legends?
Each champion gets one free reset. Every subsequent reset costs gems, which is Plarium's official policy. Plan your mastery page carefully before spending scrolls to avoid needing a paid reset.